Monday, February 25, 2019

My stab at mid-century modern chairs

As a part of our grand plan to modernize our furniture, there were our old and tired couches and rest of living room furniture that were a collection of hand-me-downs and Craigslist's treasures that were so discombobulated that we finally got tired of them. We wanted some modern looking chairs, so I decided to take a stab at them. Here is the end result.


So, here are the angles and how I made them. First came the legs. For this part, I used three 2"x6"x8' pieces of lumber for the three of them. I bought 4 planks, just in case. Here are the dimensions and the angles for the cuts:

 The first cut, I made at 30.5" at an angle of 23 degrees. The remaining plank, I cut at 12.75" at an angle of 38 degrees. Lastly, I cut the plank at 30.5 at an angle of 23 degrees. The first piece, I cut at an angle of 32 degrees. 


Notice that the angles in the picture are 90 minus the angle on your miter saw. The sequence of cuts I followed, was to minimize the times I would move the angle on the miter. After that I drilled pocket holes to put them together:

At this point I measures 2.5 inches at the bottom from the outside of each end of the leg and drew a straight line to the inside upper corner. Then I drew a curve on the top piece of the legs
I cut both sides with the skill saw and the curve with a jig saw. After a little bit of sanding, they are starting to look the part.

Then, onto the seats. I ripped a 2 by 4 at 18" at an angle of 30 degrees. Then, I cut the remaining plank at 23" at 0 degrees. The 18" piece, I cut at the 7" mark at an angle of 15 degrees DO NOT DO THIS. I recommend you cut them at 7 or 8 degrees. 15 turned out to be too much and I had to readjust. I connected them 20" apart (maybe 22 would have been better, they are a little narrow, but  wider they may not look as modern).
 I am sorry I did not take many pictures, here are my different attempts at angles and lengths.
Then, onto the upholstering. First, I added support straps:
Some burlap on top:
I am not a great upholsterer, so here I was too overwhelmed to take pictures. YouTube has many videos on how to upholster chairs:


Now, I just had to attach the legs. I just screwed them on. In the first attempt, I screwed them to high and had to redo it. I unfortunately had already painted the legs, so I had to use wood filler and more paint later on. Not good. I recommend that the seat height be placed at about 17", the front at about 19" and the back at about 40". Maybe it would have been best to set the height and drill holes for bolts before painting and upholstering. Then, after just bolting the seat on. Live and learn. Or read my blog and learn from my errors. Here are the pictures of the installation... how shameful. 


Wood filler, ick! Oh well, it sanded nicely and once painted, it's good. She had to test them:
After the O.K. we went ahead and did the last few touch-ups. If you decide to build these chairs, please send me pictures.

Happy building! 

Wednesday, February 6, 2019

Front Patio and Ana White's Adirondack Chairs

So, due to neglect and too much fishing, our front yard looked like this. 
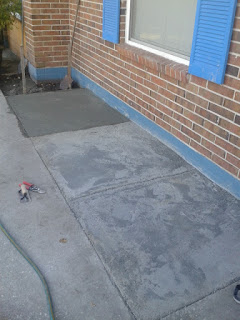
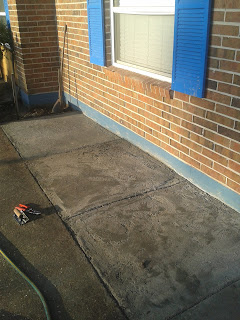
I know, quite embarrassing. We had a mesh and rocks, but with time the mesh degraded and the weeds had taken over. During the summer, I was pulling weeds out of that bed at least twice a month. If left unchecked, you can see the mess it would become. Therefore, we decided to pour concrete over and make it a patio. So, I mixed the concrete by hand with a wheel barrow and a garden hoe.

This was my first time pouring such a "big" area of concrete. I sectioned it off in more workable areas. All in all, it took a weekend to complete the pour.


Then, I built the Adirondack chairs using plans from Ana White:

http://www.ana-white.com/2013/06/plans/home-depot-adirondack-side-table

They turned out great and were very comfortable. When building them, I made a mistake I flipped the back leg backwards in all the chairs. This made the installation of the back rest a little difficult. However, I like the way they look with that back leg backwards.

Since I used pressure treated lumber for the project, I had to wait for them to dry. I left them unpainted for a couple of months. Then, we painted them when we painted the front of the house. This is what it the front of the house looks like now:
I think that is quite an improvement.

Happy building!

Monday, February 4, 2019

Ana White Bedside Tables

In my last post I mentioned that I was in the process of building beside tables for our bedroom. I used the plans from her website and did not make any modifications other than the color:

http://www.ana-white.com/2018/06/free_plans/simple-modern-bedside-table

I used wood that I had in the shed, so you see the plywood panels don't match. After they were sanded and painted, they looked the same. I had never used the pocket hole jig before, I now am a fan. That thing makes things a lot easier.
I am planning on making a bench for the end of the bed with the exact same style. I may put a couple of drawers. So, essentially two shorter and narrower bedside tables side by side. I will probably start that build in the next couple of weeks. I will make sure to annotate all the measurements and steps for that build. I didn't feel the need to do that for this build as I followed her plans step by step.


As a friend would have said, not half bad. Anyways, that was the build. Finding the appropriate comforter set and the unreasonable amount of stress that produced the wife and I is a completely different story. This one is O.K. but not amazing. In any event, I have lots of projects planned for the next couple of months, so stay tuned.

Update:
Following the same ideas, I created a bench for the foot of the bed.


Happy building!