Wednesday, February 17, 2021

Modern Dresser

 After a long hiatus, I am back with another build. Here is the finished dresser:


To build it, I adapted the general idea of the bed side tables: https://diayguay.blogspot.com/2019/02/ana-white-bedside-tables.html.

The main frame is created with 2x2's and plywood. I used pocket holes to assemble the entire frame. 


Then I created the drawers themselves and used Euro style cabinet rails to install them. 


For the paint, I did a gray wash. The way it works is the following. First, 


Now, I diluted 50/50 dark grey paint with water and brushed it on, then wiped it off with a dry rag.


Then, with lighter grey paint, and a 75/25 paint to water mix. I brushed paint over with light pressure and sparsely. 


Then, I did highlights with the same mix but with white paint.


Then, I used the same technique to paint the entire cabinet.


That's all folks!


Monday, February 17, 2020

DIY Murphy Bed - Office

This week, I finished a nice remodel at home. I finished building a Murphy bed - office combo.
So, in conversation with my wife, we determined that we were using the guest bedroom very seldom. In addition, our office space was cluttered and not pretty. So, I came up with the idea of combining the two of them and in the process we could declutter the room. So, I started creating frames to fit the height of the room and 13 inches wide and secured them to the studs. I cannot give exact measurements as you would have to fit the frames to your studs.
Then, I made a box for the bed and secured it to the frames by using a pipe flange (screwed to the box) and 1" pipe through the frames. I will try to take a picture of this part.

Excuse the terrible lighting. However, I took most pictures at night. The next step was to make the shelves on either side and screwing them to the frames. 


At this point, I was ready to cover the frames with plywood. I used half inch sanded plywood. 


Attached the legs/shelves and covered some of the holes with spackle.


Then, came the desk attachment frame. This is just a frame with three holes to accommodate for three 5/16" bolts. The desktop is bolted and can be removed when the bed will be in use.


Then, painting and decorating:


This project, took a lot of time. I tried to be as detailed as possible to ensure a nice outcome. I have a couple more projects on the way. I will post them soon.

Happy building!

Tuesday, November 19, 2019

Music responsive LED chandelier

This project is heavily based on this video:

Things I did differently. Before I cut the rings, I marked the location of the mounting points. I simply drew a vertical and horizontal line through the center of the circles across the wood before I started cutting the rings. I made the rings a little bit smaller. I painted them black as I couldn't find the laminate he uses for his rings. I used a cheaper flexible LED channel just for cost reduction. The lights do not seem to be bright enough to be the only light source in the room. But, I tested them beforehand and installed a couple of recessed lights by it.

Testing the LED channeling:


Testing the height:

All lit up:


Sunday, November 3, 2019

Mid-Century Modern dining table

When my wife and I got married, we inherited a beautiful dining set from my wife's best friend. She also got married and her husband had a similar set, so we were blessed with her lightly used set. However, after almost 10 year of use, the set was starting to look tired. My wife always insisted that we needed to get a new set or that I had to build us one. I really was never motivated to take on the task as the other set seemed perfectly serviceable to me. Nonetheless, the fact that it only sat 4 people and that we have met lots of new friends recently, made it obvious that we needed an upgrade.

So, I looked online for an apt replacement and I found one for sale but the table itself was about $900. It looked nice, but I knew that I could build it for a lot less. With that said, I have never seen any of these tables in person, nor have I measured them. This is a loose description of how I built this table by eyeballing the measurements and angles. It turned out pretty okay, I think.


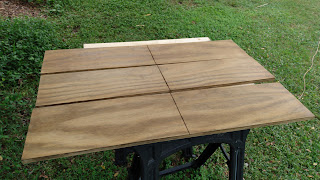
So, I brought my partner in crime with me to the Home Depot, so she could help me load some 2x12's on the truck and on that Friday night the project began. I ran  four 2x12's through the table saw to take off the beveled edges so that my boards would match tightly one against the other. I applied a lot of glue and with the help of a couple of pipe clamps and bar clamps, left the glue to dry that night. The next morning, I cut the table to a little under 7ft long, I planed the most offending areas, and sanded until my arms were tired.


I went from 60 grit, to 150, to 220. Then, I applied a Jacobean stain.

The annoying part of this process is the wait time. Also, my mower got blocked somewhere behind the table, so my yard looked like crazy. The next step was the polyurethane.
I did one coat, then sanded with 220, another coat, then sanded with 400 grit, then another coat and sanded by hand with 1500 grit. It is smooth, let me tell ya. So, I summoned my helper once again and we brought the table top in the house. Let me tell you, that thing is heavy! So, I had to wait until the next weekend. I began working on the metal brace. I cut a 6ft, 1" square tube (from Home Depot) in the following way, I measure 1ft from either side and made a 45 degree cut on either side. Then I measured a foot from each 45 degree end and cut at a right angle. This gave me 4 pieces at 1ft and one piece at a little over 2ft. I welded the 45 degree pieces to make a right angle then I made sure that they were square and marked a cut at 1" on each end. Here is the result.
To make the clamps that are bolted to the legs I cut a 3" flat in 2" pieces. I then made a guide cut at a 7/8" to then bend over a 2x4. I welded them across and drilled a hole 1 1/2" from the top of the clamp. I wish I would have taken more pictures of this process, but I was figuring it out as I went. If you have questions DM me, I can draw diagrams for you. I primed and painted the bar flat black. Now I had to make the legs. This is how you make them. From a 2x10" you cut them at 15 degrees and 29" long on the miter saw. Then, with a skill saw, you cut the triangles out of them. I measured 8 inches from the top and made that one of the vertices of my triangle. They say an image speaks more than a thousand words. Here is the picture:


Then, I stained and applied polyurethane on the legs as I made the top braces to attach the legs. Here is my best picture of those:

If you zoom in you can see the braces. I attached the legs with a total of 12, 1/4"x1" lag screws. The plan was to do 16, but 4 landed right on the glue lines... so 12 it is.

The legs take a bit of finagling. I attached them and tightened them just a little bit, then I moved them back and forth until everything was perfectly level. BTW, when I was done cutting the legs I clamped them all together and sanded them so they were all the exact same size. That helped keep everything level.


That's pretty much it. It went remarkably smoothly for my usual standards and I am very happy with the result.

Happy building!

Monday, February 25, 2019

My stab at mid-century modern chairs

As a part of our grand plan to modernize our furniture, there were our old and tired couches and rest of living room furniture that were a collection of hand-me-downs and Craigslist's treasures that were so discombobulated that we finally got tired of them. We wanted some modern looking chairs, so I decided to take a stab at them. Here is the end result.


So, here are the angles and how I made them. First came the legs. For this part, I used three 2"x6"x8' pieces of lumber for the three of them. I bought 4 planks, just in case. Here are the dimensions and the angles for the cuts:

 The first cut, I made at 30.5" at an angle of 23 degrees. The remaining plank, I cut at 12.75" at an angle of 38 degrees. Lastly, I cut the plank at 30.5 at an angle of 23 degrees. The first piece, I cut at an angle of 32 degrees. 


Notice that the angles in the picture are 90 minus the angle on your miter saw. The sequence of cuts I followed, was to minimize the times I would move the angle on the miter. After that I drilled pocket holes to put them together:

At this point I measures 2.5 inches at the bottom from the outside of each end of the leg and drew a straight line to the inside upper corner. Then I drew a curve on the top piece of the legs
I cut both sides with the skill saw and the curve with a jig saw. After a little bit of sanding, they are starting to look the part.

Then, onto the seats. I ripped a 2 by 4 at 18" at an angle of 30 degrees. Then, I cut the remaining plank at 23" at 0 degrees. The 18" piece, I cut at the 7" mark at an angle of 15 degrees DO NOT DO THIS. I recommend you cut them at 7 or 8 degrees. 15 turned out to be too much and I had to readjust. I connected them 20" apart (maybe 22 would have been better, they are a little narrow, but  wider they may not look as modern).
 I am sorry I did not take many pictures, here are my different attempts at angles and lengths.
Then, onto the upholstering. First, I added support straps:
Some burlap on top:
I am not a great upholsterer, so here I was too overwhelmed to take pictures. YouTube has many videos on how to upholster chairs:


Now, I just had to attach the legs. I just screwed them on. In the first attempt, I screwed them to high and had to redo it. I unfortunately had already painted the legs, so I had to use wood filler and more paint later on. Not good. I recommend that the seat height be placed at about 17", the front at about 19" and the back at about 40". Maybe it would have been best to set the height and drill holes for bolts before painting and upholstering. Then, after just bolting the seat on. Live and learn. Or read my blog and learn from my errors. Here are the pictures of the installation... how shameful. 


Wood filler, ick! Oh well, it sanded nicely and once painted, it's good. She had to test them:
After the O.K. we went ahead and did the last few touch-ups. If you decide to build these chairs, please send me pictures.

Happy building! 

Wednesday, February 6, 2019

Front Patio and Ana White's Adirondack Chairs

So, due to neglect and too much fishing, our front yard looked like this. 
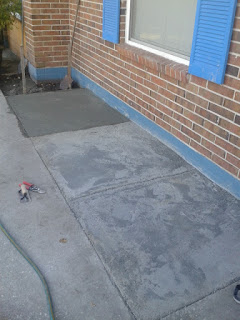
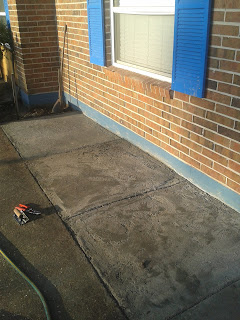
I know, quite embarrassing. We had a mesh and rocks, but with time the mesh degraded and the weeds had taken over. During the summer, I was pulling weeds out of that bed at least twice a month. If left unchecked, you can see the mess it would become. Therefore, we decided to pour concrete over and make it a patio. So, I mixed the concrete by hand with a wheel barrow and a garden hoe.

This was my first time pouring such a "big" area of concrete. I sectioned it off in more workable areas. All in all, it took a weekend to complete the pour.


Then, I built the Adirondack chairs using plans from Ana White:

http://www.ana-white.com/2013/06/plans/home-depot-adirondack-side-table

They turned out great and were very comfortable. When building them, I made a mistake I flipped the back leg backwards in all the chairs. This made the installation of the back rest a little difficult. However, I like the way they look with that back leg backwards.

Since I used pressure treated lumber for the project, I had to wait for them to dry. I left them unpainted for a couple of months. Then, we painted them when we painted the front of the house. This is what it the front of the house looks like now:
I think that is quite an improvement.

Happy building!